How to Make Curls with Flat Iron: Step by Step

in short hair
In shorter hair, the tip is always to use a small and thin flat iron, because if it is too thick, you will not be able to form the curls.
You will need:
- Curling iron
- thermal protector
- Curl activator or texturizer
- fixing spray
- clips
- Comb
Walkthrough:
- Wash your hair as usual, but avoid using too much conditioner or a moisturizing mask, as this will make your hair smoother and more difficult to set curls.
- Then apply a thermal protector to the hair and dry it with the help of the hairdryer.
- In case your case is very smooth and difficult to roll, put a little curl activator in your threads;
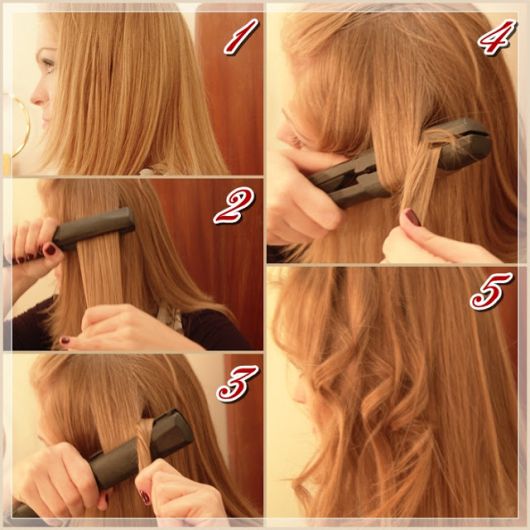
- Part the hair, separating the top part from the bottom with a barrette.
- Start at the bottom of the hair, separating this part into small strands.
- Pass the flat iron a little at the root and rotate it, making a movement from the outside to the inside. Then slowly slide the accessory through your hair.
- When you finish the first strand, you will see that the curl is already formed. Then just repeat the process all over your hair.
- After doing this step by step all over your hair, apply a hairspray to your hair. It will help hold the curls longer.
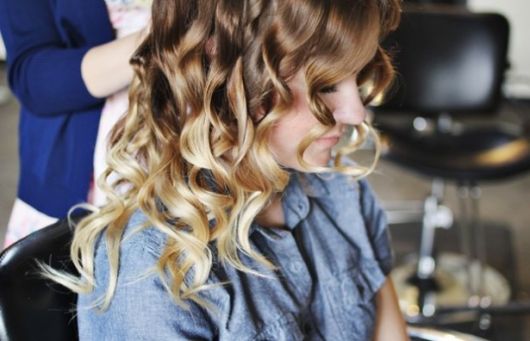
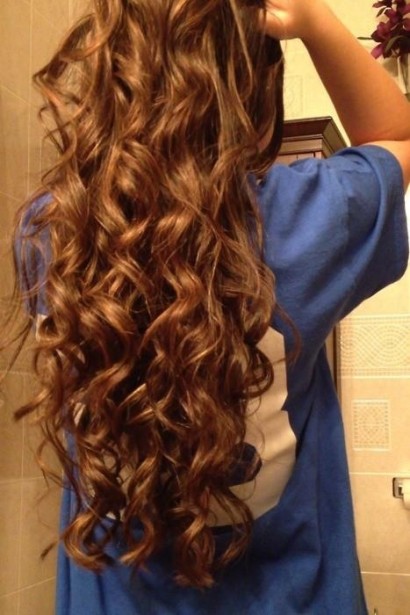
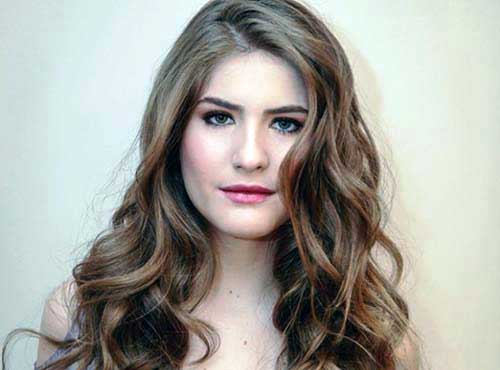
- If you want to create more voluminous hair and let the curls loose, with a more natural effect, just run your hand through your hair from the inside out. The result is beautiful and elegant hair, ready for any occasion.
Remember that with curly hair, you can create a amazing hairstyle to party. You can pin a section of hair or a few strands, which will look amazing!
Let's know some more extra tips?
- Do not curl the hair with the flat iron if it is wet. Doing it this way, you damage the strands and burn your hair. So, dry them before always, ok?
- For mega voluminous hair, put a little mousse on the strands. For this, you just need to apply the product and wait for your hair to dry. Then start modeling with the flat iron. The mousse manages to texturize the hair and leave it with beautiful curls.
- The more you squeeze the flat iron in this process, the more defined the curl will be.
- To keep the root flat and curl only the ends, when you rotate the flat iron, leave at least two fingers of space at the root to start curling.
- It may be that the first few times you feel a lot of difficulty, so don't give up, keep practicing that as you go along, the curls will be more beautiful.
- Do not leave the flat iron in contact with the hair for more than 10 seconds, as the high temperature can burn your hair or even make it fall out. So be very careful with that!
with aluminum foil
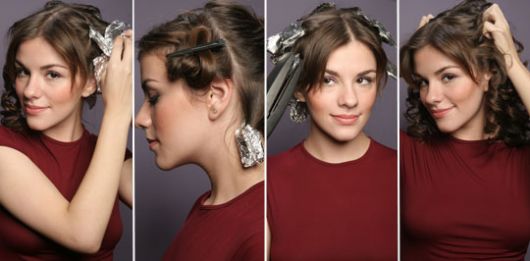
Curling your hair with aluminum foil can be a good option if you're looking for an alternative that won't burn your hair or avoid direct contact with the flat iron. The step by step on how to make curls with flat iron and aluminum foil is very simple, check it out below:
You will need:
- Comb
- clips
- fixing spray
- Aluminum paper
- Curling iron
Walkthrough:
- With hair washed and dry, divide the locks into four parts. Secure the sides of the hair and the top, leaving only the back part loose, as you will start in this area.
- Spray the loose part with hairspray and divide it into sections. The thinner the strand, the more defined the curl will be. So, if you want more natural curls, take strands of medium width.
- Roll the hair with your finger and cover it with a piece of aluminum foil. Do this all over your hair.
- After all the locks are curled, pass the flat iron on each foil, holding it for 15 seconds.
- Let go of the hair and fix it with your hands.
- Ready! Your hair will be curly, without being damaged by the heat of the flat iron, because the aluminum foil protected it!
If you have any doubts about this process, watch the video below:
And have you ever tried curling your hair? Let us know if you liked our flat iron curl hacks and it worked out for you. Hugs! 🙂